Boiler Multiproject
Equipments
Motors
MT300 – Forced Air Fan
MT305 – Induced Draft Fan
MT311 – Soot Blower nr. 1
MT312 – Soot Blower nr. 2
MT313 – Soot Blower nr. 3
MT314 – Soot Blower nr. 4
MT306 – Ash Removal Thread
MT301 – Bagasse Feeder nr. 1
MT302 – Bagasse Feeder nr. 2
MT303 – Bagasse Feeder nr. 3
MT304 – Bagasse Feeder nr. 4
MT307 – Pneumatic Distributor Fan
MT101 – Bagasse Conveyor - Elevator
MT102 – Bagasse Metal Conveyor - Distribution
MT103 – Bagasse Conveyor - Leftover
MT104 – Bagasse Metal Conveyor - Mountain
MT105 – Bagasse Conveyor - Return
ON-OFF Valves
XV350 - Bottom Dump Valve
XV351 - Popet Valve nr. 1
XV352 - Popet Valve nr. 2
XV353 - Popet Valve nr. 3
XV354 - Popet Valve nr. 4
XV355 - Popet Valve nr. 5
XV356 - Popet Valve nr. 6
XV357 - Popet Valve nr. 7
XV358 - Popet Valve nr. 8
XV359 - Popet Valve nr. 9
Instruments
Analog
LT200 – Boiler Level
FT200 – Feed Water Flow
FCV200 - Feed Water Valve
FT300 – Superheated Steam Flow
PT300 - Overheated Steam Pressure
PT500 - Oven Pressure
TT300 - Steam Temperature in Superheater
TCV300 - Steam Desuperheater Valve
FCV300 - Superheater Ventilation Valve
PT310 - Soot Blowers Steam Pressure
PCV310 - Soot Blowers Steam Valve
Digital
LSLL200 - Boiler Safety Level Electrode
ZSC350 - Bottom Dump Valve Closed Sensor
ZSC351 - Popet Valve nr. 1 Closed Sensor
ZSC352 - Popet Valve nr. 2 Closed Sensor
ZSC353 - Popet Valve nr. 3 Closed Sensor
ZSC354 - Popet Valve nr. 4 Closed Sensor
ZSC355 - Popet Valve nr. 5 Closed Sensor
ZSC356 - Popet Valve nr. 6 Closed Sensor
ZSC357 - Popet Valve nr. 7 Closed Sensor
ZSC358 - Popet Valve nr. 8 Closed Sensor
ZSC359 - Popet Valve nr. 9 Closed Sensor
ZSO350 - Bottom Dump Valve Open Sensor
ZSO351 - Popet Valve nr. 1 Open Sensor
ZSO352 - Popet Valve nr. 1 Open Sensor
ZSO353 - Popet Valve nr. 1 Open Sensor
ZSO354 - Popet Valve nr. 1 Open Sensor
ZSO355 - Popet Valve nr. 1 Open Sensor
ZSO356 - Popet Valve nr. 1 Open Sensor
ZSO357 - Popet Valve nr. 1 Open Sensor
ZSO358 - Popet Valve nr. 1 Open Sensor
ZSO359 - Popet Valve nr. 1 Open Sensor
Pictures
Side View
Front View
Soot Blowing
Grid Cleaning
Bagasse Conveyors
Controls
Pressure Control
Level Control
Temperature Control
Project – Boiler_Prj
The Boiler project contains:
Boiler_Prj - AS_CALD (Boiler/Caldeira);
1 Engineering PC Station with WinCC Application – ES;
Boiler Project – Boiler_Prj
AS_CALD
Rack UR2
Slots
1 – PS 407 10A
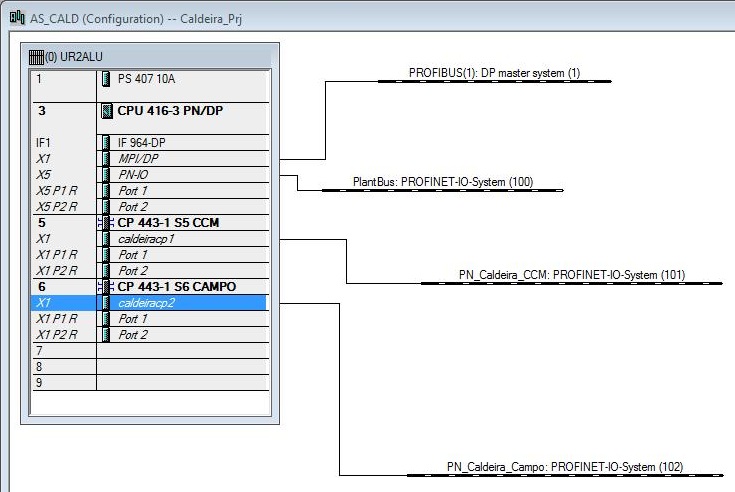
3 – CPU 416-3 PN/DP - AS416-3 AC10A CP443-1EX30.
X5 – 192.168.0.1
5 – CP 443-1 S5 CCM
X1 – caldeiracp1 192.168.0.10
6 – CP 443-1 S6 CAMPO
X1 – caldeiracp2 192.168.0.20
ES – Simatic PC Station
WinCC Application
Plant Bus - IE General – 192.168.0.2
ES – ENGINEERING STATION
Click here to download Project Boiler filesFiles include pictures and SCL files.
Creating the multiproject
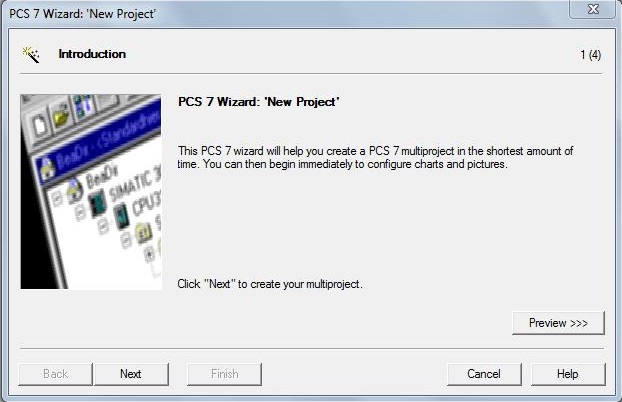
• Launch the PCS 7 “New Project” wizard in Simatic Manager (menu File > ‘New Project’ Wizard...)
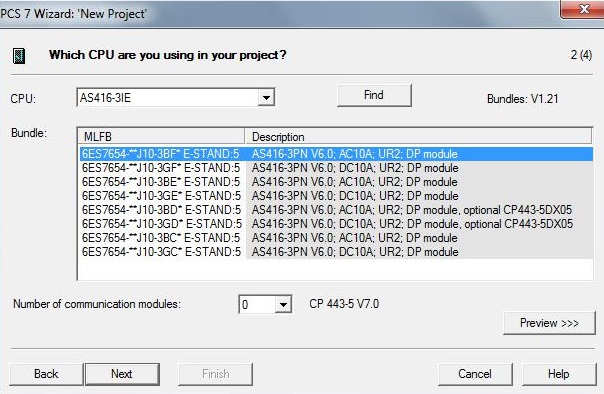
• Select the CPU you are using in the project. Details of the selected CPU are shown on the screen. In case your CPU is not shown in the list, you will need to upgrade hardware in HW-config. The CPU is called AS (Automation System).
• Select CPU AS416-3IE AC10A; UR2; CP443-1EX30.
• Define zero communication modules CP443-5 V7.0.
• Define the number of plant hierarchy levels, select the objects for configuration on AS (CPU) and OS (Operator System) –SupervisoryWinCC). Also select the type of network architecture:

• Choose number of Plant Hierarchy levels = 3.
• AS objects – CFC and SFC charts.
• OS objects - PCS7 OS - Single station system (ES and OS in same station). ES is the Engineering Station, the computer where the entire project configuration is done.
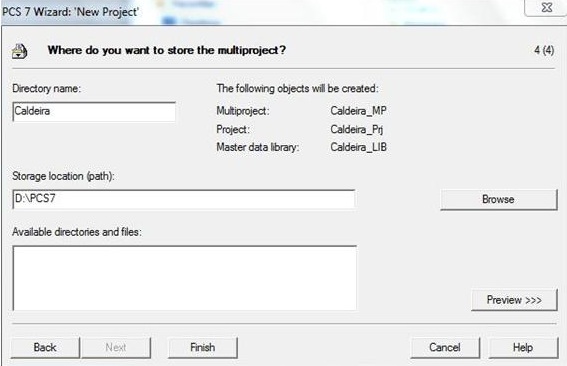
• Set Directory name to Boiler. Choose the multiproject storage location on your computer.
• Rename AS to AS_CALD. Right-click on SIMATIC 400 (1) and choose Rename menu item.
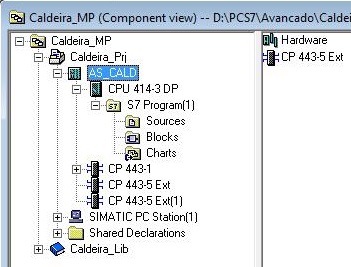
• Rename the S7 Program to CALD.

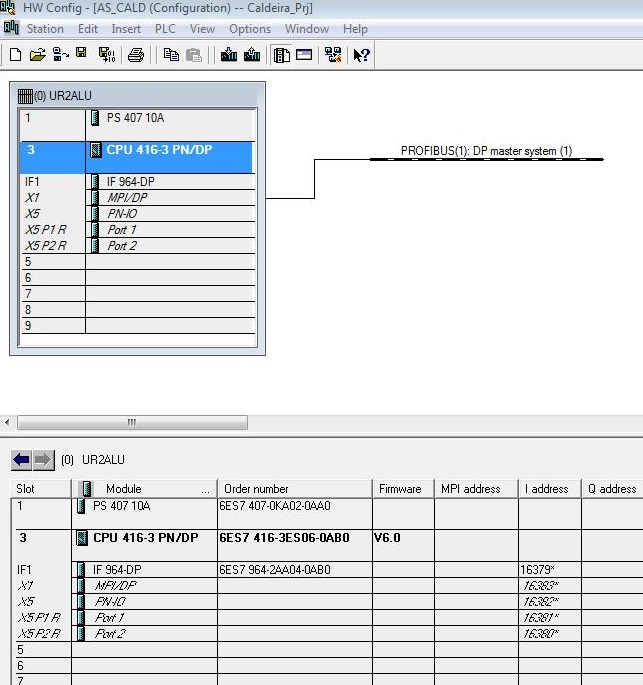
Open HW Config
• In Component View, double click on Hardware.
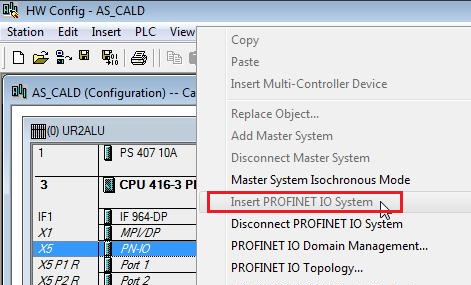
• Insert Profinet IO network from the CPU 416-3 PN/DP Ethernet interface. Right-click on slot 3 X5 and select Insert PROFINET IO System menu item....
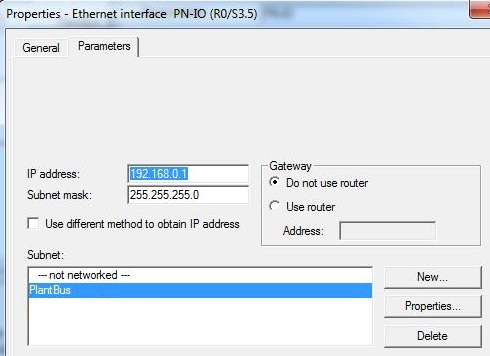
• Open the properties of the Ethernet interface. Keep IP Address and add the PlantBus subnet by clicking the New ... button.
• Associate CPU Ethernet Interface with PlantBus Subnet.
• Insert CP 443-1 6GK7 443-1EX30-0XE0 in slot 5 (catalog - Profile Standard > SIMATIC 400\CP-400\Industrial Ethernet\CP 443-1\6GK7 443-1EX30-0XE0). Mouse click on rack position to insert module (slot5). Then double click on the catalog item to insert (V2.0).
• Choose IP Address from CP443-1 Ethernet Interface S5.1 - IP 192.168.0.10 and Mask 255.255.255.0.
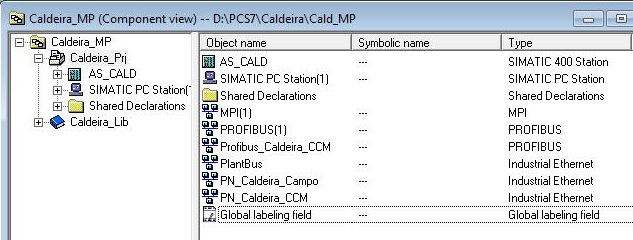
• Create PN_Caldeira_CCM subnet.
• Choose PN_Caldeira_CCM subnet for CP 443-1.

• Rename Slot 5 to CP 443-1 S5 CCM.
• Rename Slot 5 X1 to caldeiracp1.
• Click on Slot5 X1 and select Insert PROFINET IO System menu item to open the new subnet.name Slot 5 for CP 443-1 S5 CCM
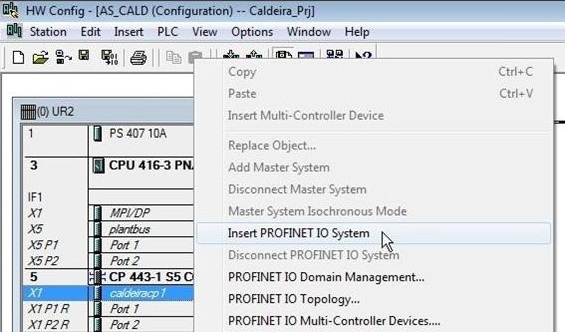
• Insert CP 443-1 6GK7 443-1EX30-0XE0 in slot 6 (catalog - Profile Standard > SIMATIC 400\CP-400\Industrial Ethernet\CP 443-1\6GK7 443-1EX30-0XE0). Mouse click on rack position to insert module (slot6). Then double click on the catalog item to insert (V2.0).
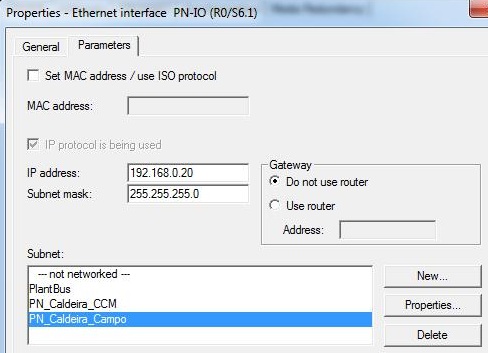
• Choose IP Address of CP443-1 Ethernet Interface R0 / S6.1 - IP 192.168.0.20 and Mask 255.255.255.0.Click with mouse in rack position to insert module (slot6). Then double click on the catalog item to insert (V2.0).
• Create PN_Caldeira_Campo subnet.
• Choose subnet PN_Caldeira_Campo for CP 443-1.
• Rename Slot 6 to CP 443-1 S6 CAMPO.
• Rename Slot 6 X1 to caldeiracp2.
• Click on Slot6 X1 and select PROFINET IO System menu item to open the new subnet.
• Save and compile configuration.
Unregistered user. Buy the training at jats.com.br.