Project
Creating a new project
• Open your installed Siemens TIA Portal (regardless of version).
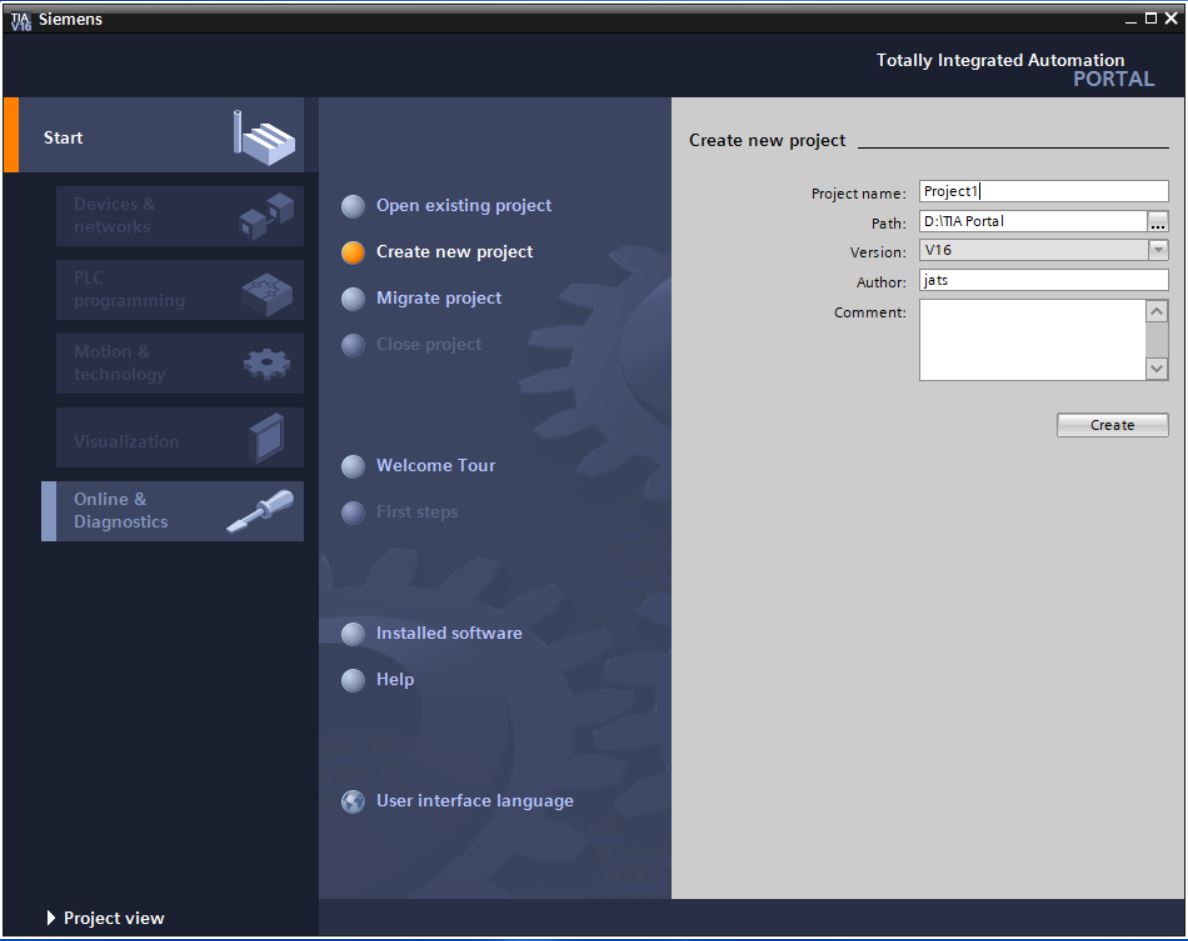
• In the Start window, select item Create new project. Inform project name (Project1), Path (storage location) and Author. Click on the Create button.
• The project is created and the first steps are presented: Devices & networks, PLC programming, Motion & technology and Visualization.
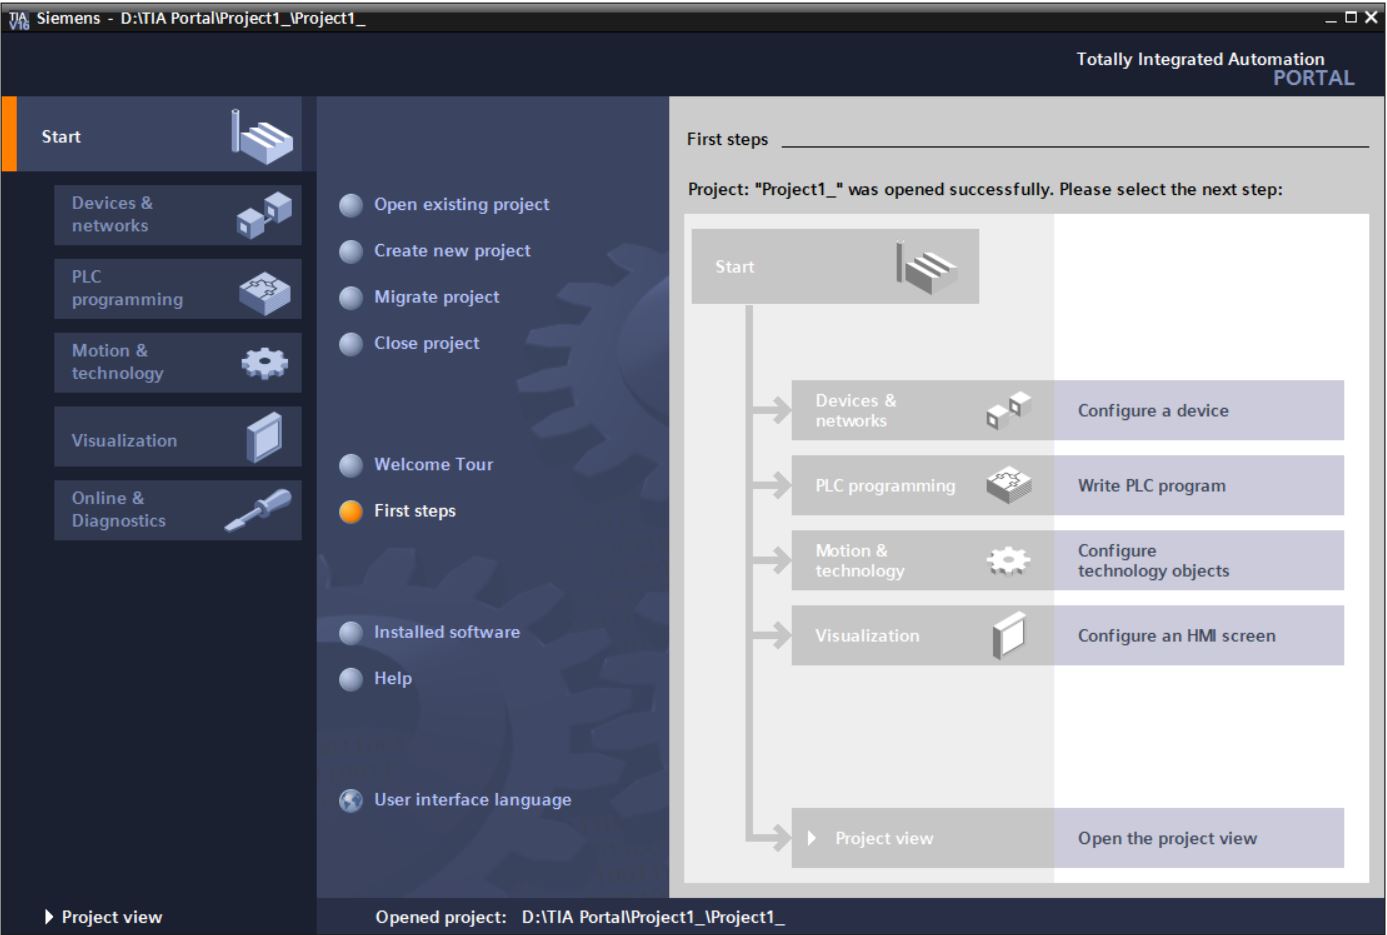
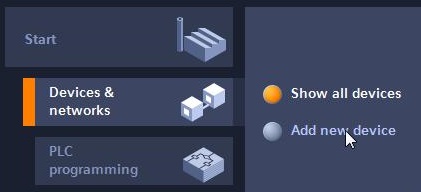
• Click on Configure a device.
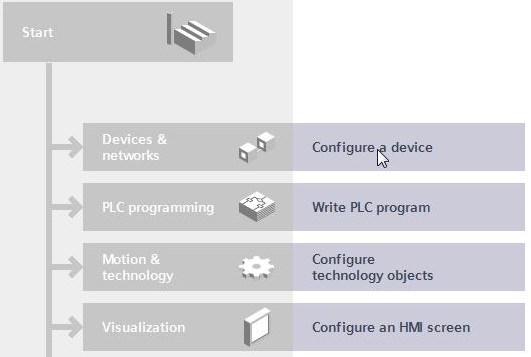
• Devices will be presented (none created at the moment). Click on Add new device.
• Inform the name of the Device (PLC_1). Select Controllers > SIMATIC S7-1200 > CPU > CPU 1215C > 6ES7 215-AG31-0XB0 V3.0. Click on Add button.
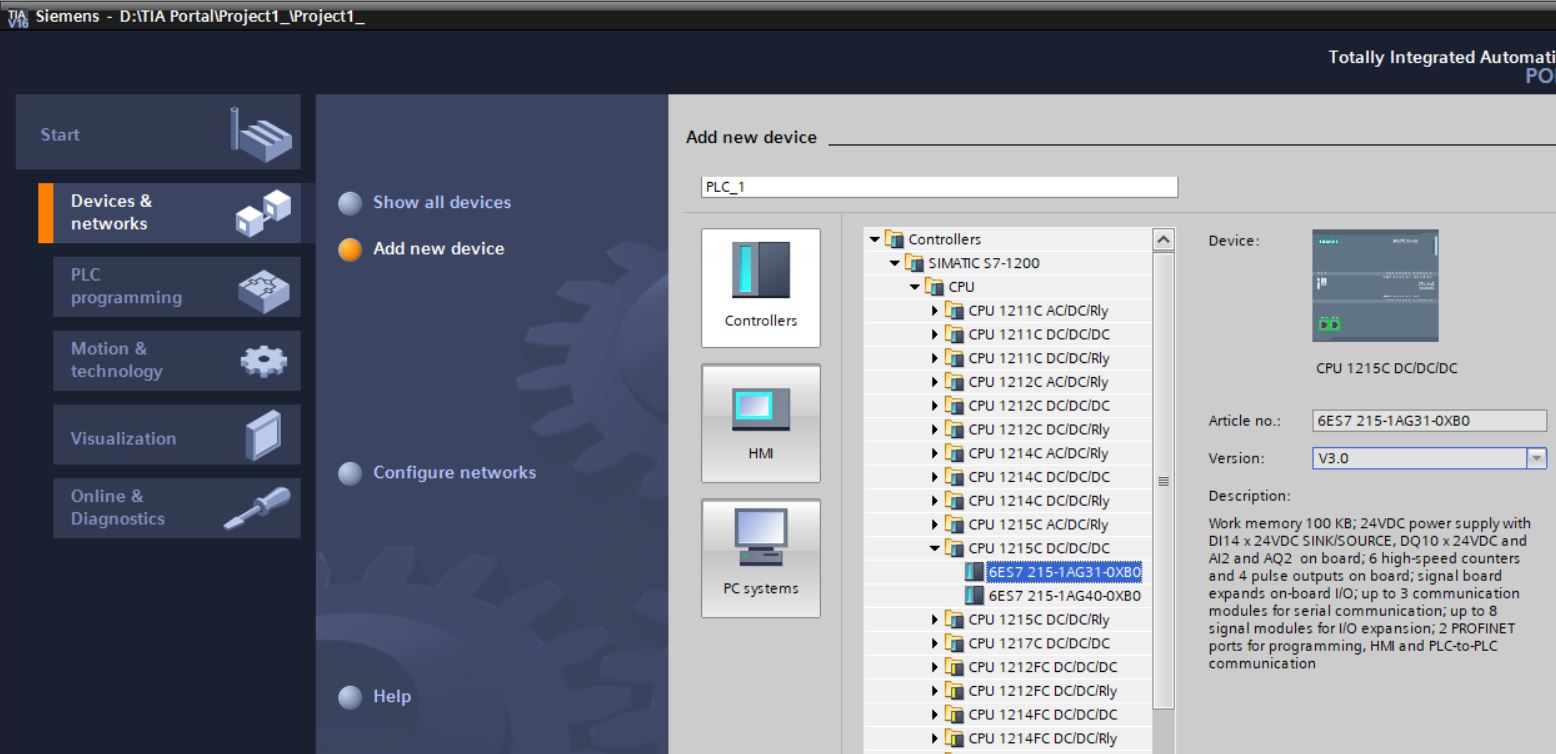
Note: If this controller is not available in your version catalog, please select another S7-1200 controller.
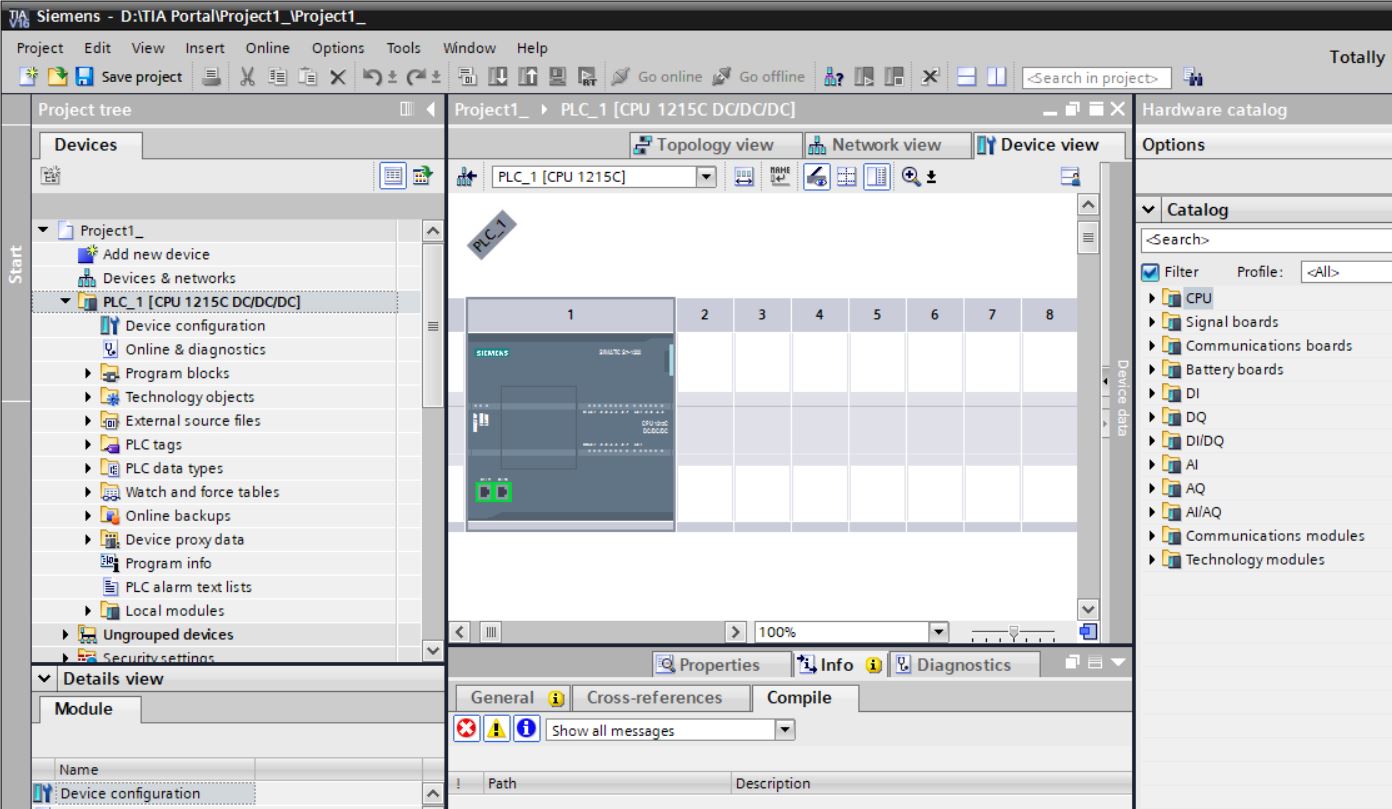
• Project created.
• Save the project by clicking on the Save project button or via the Project > Save menu.
• Close the project (Menu Project > Close) or close the application (Menu Project > Exit).
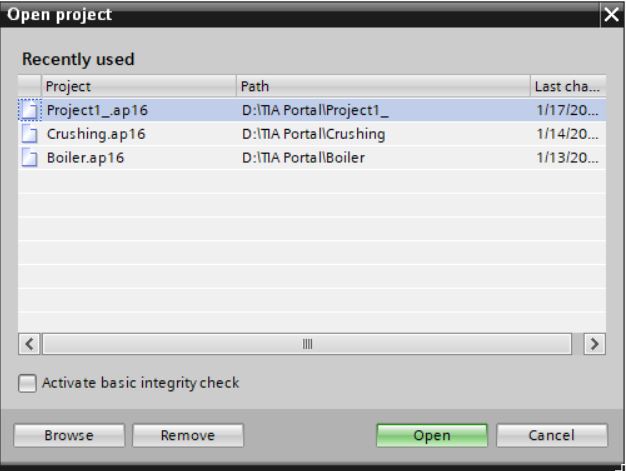
• Reopen the project. Menu Project > Open...
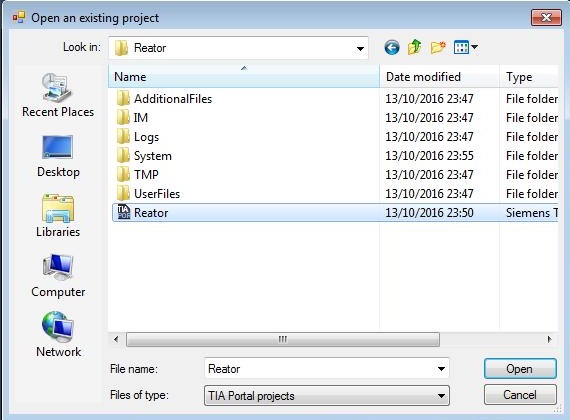
• In version 16, by selecting the menu item Open..., a dialog box will appear and the project to open must be selected.
• In some older versions, by selecting the Open menu item, a dialog box will appear and the storage location and project to open must be selected.
Views
Three different views are possible in an automation project:
• portal view is a view oriented to task;
• project view is a view of the project components;
• library view shows the elements of the project library and the open global libraries.
A link is used to change from one view to another.
Portal View
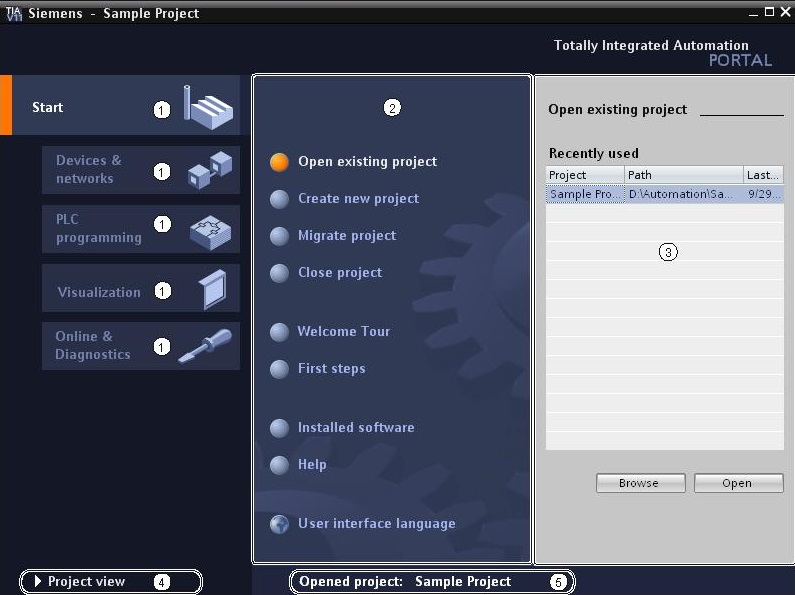
1 – Portals for different tasks
2 – Actions of the selected portal
3 – Selection panel of the selected action
4 – Switch to project view
5 – Project display that is currently open
The portals present the basic functions of the tasks of several areas (Devices & network, PLC programming, Visualization, Online & Diagnostics). The portals presented in the view portal depend on the products that are installed.
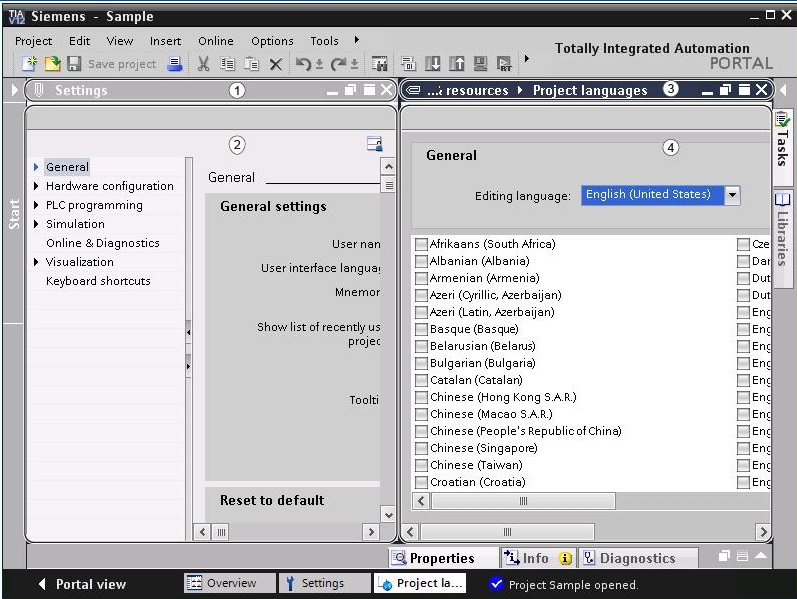
Project View

1 – Title bar
The project name is shown in the title bar.
2 – Menu bar
The bar menu contains all the commands necessary for the job.
3 – Toolbar
The toolbar offers frequently used command buttons. Allows quick access to these commands.
4 – Project tree
The Project tree offers access to all components and project data. It is possible to perform the following tasks through Project tree:
• Add new components
• Edit existing components
• Search and modify the properties of existing components
Project tree layout
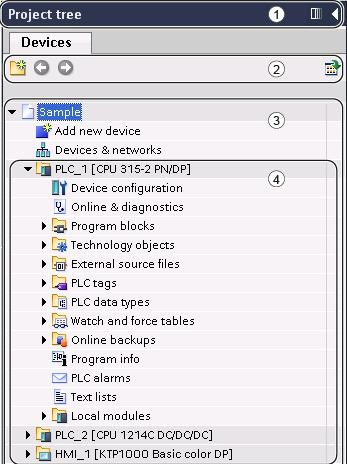
4.1 – Title bar
The Title bar has a button to expand and retract automatically or manually the Project tree.
4.2 – Toolbar
The following tasks can be done in the toolbar of the Project tree:
• Create a new user folder.
• Navigate to a link or return to the link.
• Show an overview of the selected object in the work area.
4.3 – Project
All the objects and actions related to the project can be found in the "Project" folder:
• Devices
• Languages & resources
• Online access
4.4 – Devices
There is a separate folder for each project device. The objects and actions belonging to the device are arranged within this folder.
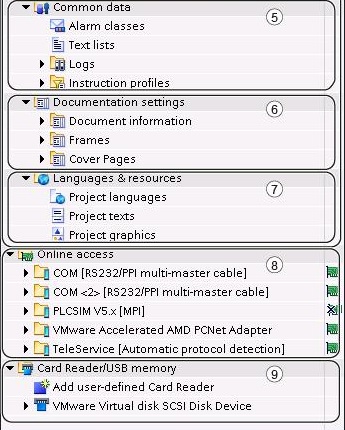
4.5 – Common data
This folder contains data that can be used through more of a device, such as common message classes, logs, scripts and text lists.
4.6 – Documentation settings
In this folder, it is possible to specify the layout of the project table to be printed.
4.7 – Languages and resources
It is possible to determine the language and texts of the project in that folder.
4.8 – Online access
This folder contains the devices/PC programming interfaces.
4.9 – Card Reader/USB memory
This folder is used to manage all the card readers and other USB storage media for programming devices/PC.
5 – Reference projects
In the "Reference projects" tab it is possible to open other projects beyond the current project. These reference projects are write protected and can not be edited. However, it is possible to drag the reference project objects to the current project and edit them there. It is possible to compare objects of a reference project and the current project.
"Reference projects" tab layout
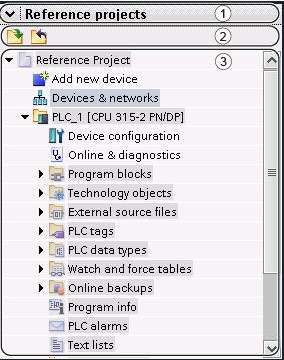
5.1 – Title bar
The arrows to open/close the "Reference projects" tab are in the Title bar.
5.2 – Toolbar
The Toolbar contains buttons to open and close Reference projects.
5.3 – Opened reference projects
Reference projects are shown as read-only with their objects and hierarchical structure.
6 – Details view
The Detail view shows the content of the selected object which is in the overview window or in the project tree.
Details view layout
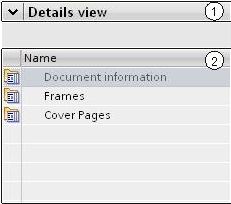
6.1 – Title bar
The arrows to open/close the "Details view" tab are in the Title bar.
6.2 – Content of selected object
7 – Work area
Objects that can be opened for editing are displayed in Work area. These objects include, for example:
• Editors and views
• Tables
You can open several objects. However, it is only possible see each of these objects at once. All other objects are displayed as tabs in the Editor bar. You can see two objects at the same time using the horizontal and vertical work area divisions.
Work area layout divided vertically:
7.1 – Title bar of left-hand editor
7.2 – Work area of left-hand editor
7.3 – Title bar of right-hand editor
7.4 – Work area of right-hand editor
8 – Dividers
9 – Inspector window
Additional information of a selected object or ation executed are displayed in the Inspector window.
Inspector window layout
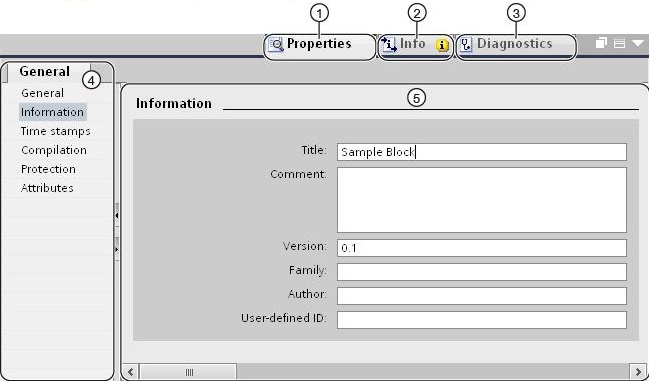
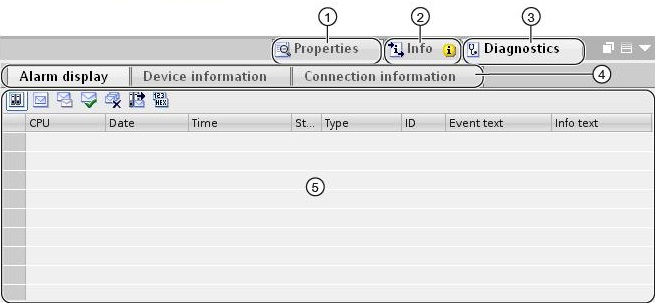
9.1 – Properties tab
Displays the selected object properties. The properties editable can be changed here.
9.2 – Info tab
This tab shows additional information about the selected object, as well as alarms about executed actions (such as compilation).
9.3 – Diagnostics tab
This tab provides information about system diagnostic events, configured alarm events, and communication diagnostics.
9.4 – Navigation between the tabs
10 – Change to Portal view
11 – Editor bar
The Editor bar shows the open editors.
12 – Status bar with progress display
In the status bar, there is the progress display of processes that are running.
13 – Task cards
Depending on the selected object, tasks cards that allow additional actions are carried out. These actions include:
• Select objects from a library or hardware catalog
• Search and replace objects in the project
• Drag predefined objects to the working area
The tasks cards are located in a bar on the right side from the screen. It is possible to retract or expand them at any time. The tasks cards shown depend on the installed products. The more complex tasks cards are divided into panels.
Task cards layout
13.1 – Closed task cards
13.2 – Open task cards
13.3 – Open tab of a task card
13.4 – Closed tab of a task card
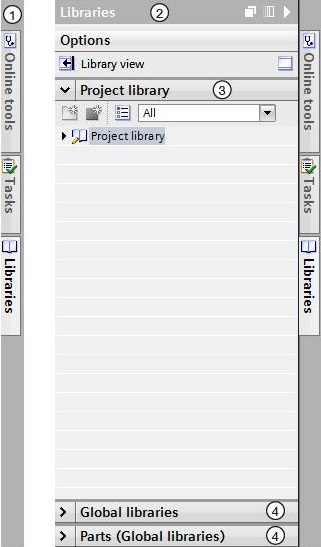
Library view
A library view combines the functionalities of the task card "Libraries" and the overview window. It allows to show the elements of a library in different views and shows more properties of the element in the detail view, for example. Tab open of a task card
Library view layout
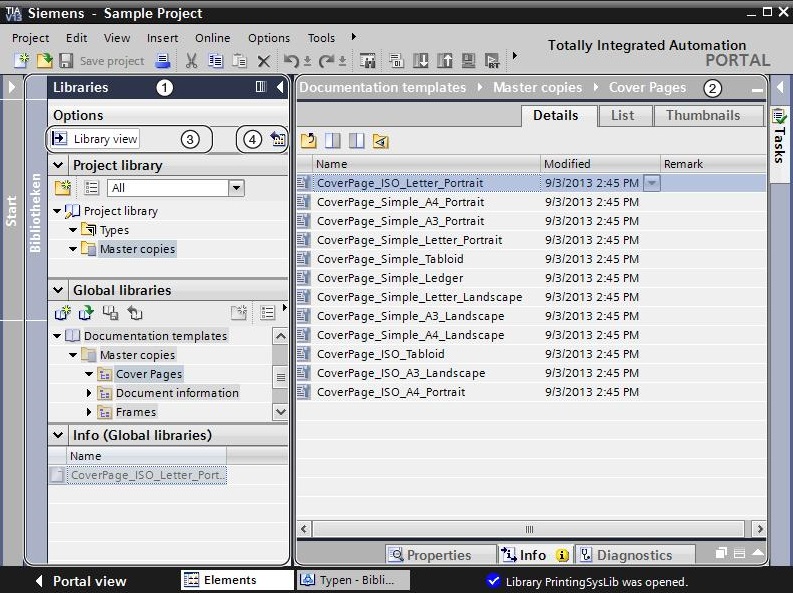
1 – Library tree
2 – Library overview
3 – “Library view” button
4 – “Open or close library overview” button
Overview window
The Overview window complements the project tree. Displays the contents of the selected folder in the Project tree. In the most, the following actions can be executed in Overview window:
• Open objects
• Show and edit object properties in Inspector window
• Rename objects
• Call specific actions of shortcut menu objects
• Compare objects side by side
• Execute several object actions
Overview window layout
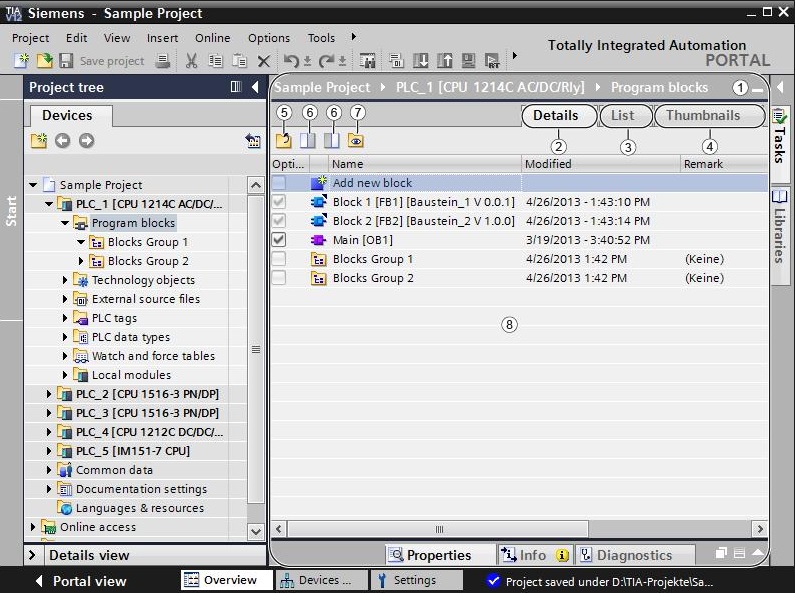
1 – Overview window
2 – Switch to Detail view
3 – Switch to List view
4 – Swithc to Icon view
5 – Go to the highest level
6 – Split overview window in two
7 – Show all the elements of the selected folder
8 – Content of selected object in the project tree.
Next Unregistered user. Buy the training at jats.com.br.